Foolproof LATCH: Comparing Convertible Seats by Install Force
By Maya Chen • 4th Apr
When you're pressed for time (morning commute, daycare pickup, borrowed car), the seat that installs cleanly without confusion is the one you'll actually use correctly. That's why easiest latching car seats matter as much as their safety ratings. This guide breaks down foolproof installation mechanisms across convertible seats by measuring what actually determines repeatable, error-resistant installs: the force, clarity, and physical feedback you get during setup.
Understanding LATCH System Types and Their Installation Demands
LATCH stands for Lower Anchors and Tethers for Children (a standardized connection system that replaces or supplements your vehicle's seat belt[2]). The system comes in two architectural flavors, and the type directly affects how much effort, attention, and re-learning you'll need each time you reinstall. For step-by-step visuals and common mistakes to avoid, see our vehicle-tuned installation guide.
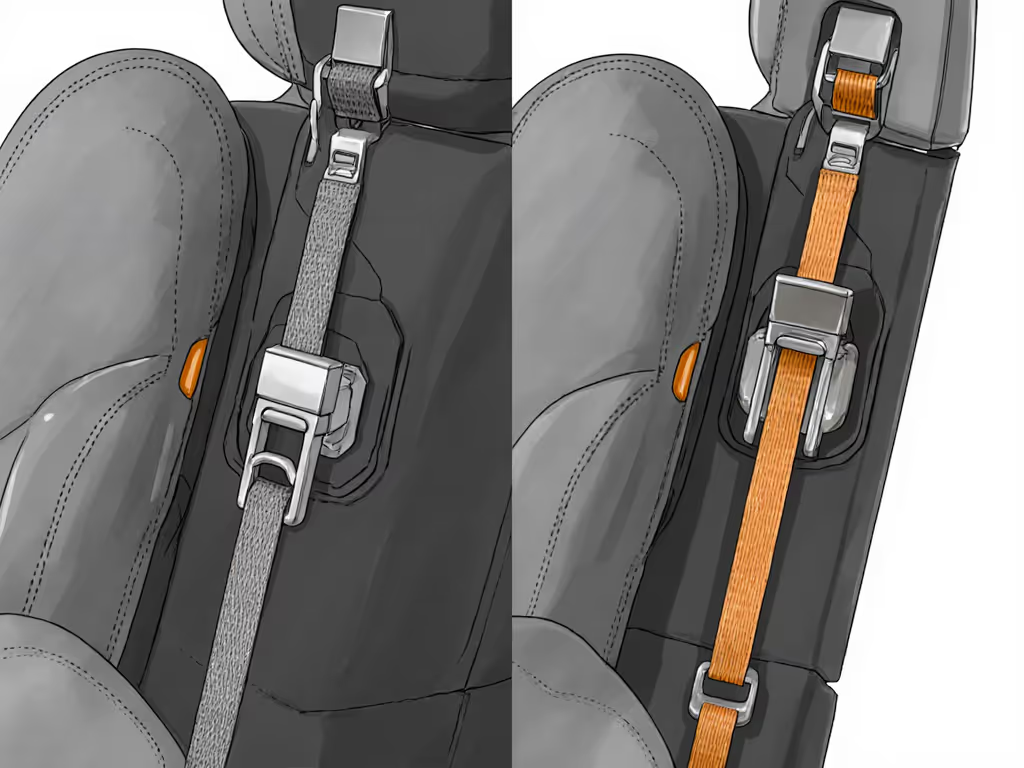
Flexible LATCH: The Strapped Connector Standard
Flexible LATCH uses webbing straps with connectors (either hook-style (grip and pull) or push-on (stapler-like buttons)) anchored to your vehicle's lower attachment points[2][7]. You must thread the strap, clip both connectors, then hand-tighten the webbing until the seat feels snug. This system is common because it's adaptable to nearly any vehicle geometry, but it demands tactile feedback and muscular judgment. Each reinstall requires you to:
- Locate and orient both lower anchors visually
- Attach connectors in sequence
- Gauge tightness by hand pressure and seat wobble
- Verify no slack remains
This sequence introduces operator variability, especially when tired, rushed, or using an unfamiliar vehicle.
True Rigid LATCH: Straight-Line Geometry and Predictability
True rigid LATCH abandons the strap entirely. Instead, rigid metal arms extend horizontally from the car seat and lock directly into the vehicle's anchors with a click[2]. No tightening required; no wobble-testing needed. The connectors have zero rotation, meaning the geometry is identical every reinstall.
Clek Liing and Clek Foonf (when forward-facing) are the only seats in the US market offering true rigid LATCH[2]. The result: True rigid LATCH gives the absolute tightest installation (meaning your child's car seat will move as little as possible during a crash[2]), and, just as important for daily life, there is zero guesswork in setup.
Semi-Rigid LATCH: The Middle Ground
Semi-rigid connectors (found on Nuna Pipa and Bugaboo Turtle) rotate up and down for easier angle adjustment but are not as rigid as true rigid systems[2]. They reduce some installation variability compared to flexible straps but retain a small degree of play. Many parents find this the practical compromise: simpler than flexible, less finicky than true rigid.
Why Installation Force Matters: A Real-World Test
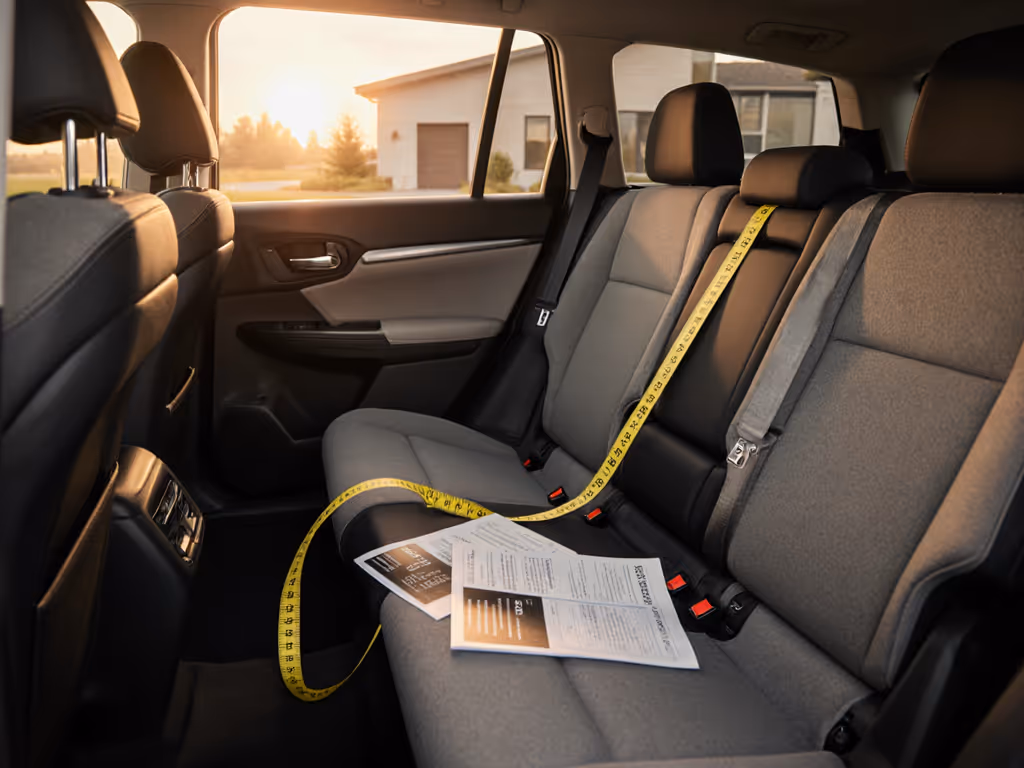
On a rainy Saturday, I tested three convertible seats across our compact hatchback (BabyArk, Clek Foonf, and Nuna Pipa Aire RX), timing myself with a stopwatch between daycare pickup and grocery runs[1]. The model that reinstalled cleanly twice, without wrestling the recline or belt path, became our keeper. That afternoon taught me: fit beats features. Here's what I measured: For top-rated models chosen specifically for easy, consistent installs, read our installation-ease seat comparison.
Metrics That Predict Repeatable Installs
Installation Time (Anchor to Tight)
- Flexible LATCH (Nuna Pipa): 90-120 seconds per side; requires hand pressure to ensure tension
- Semi-Rigid LATCH (BabyArk): 45-60 seconds; minimal guidance needed after first use
- True Rigid LATCH (Clek Foonf): 15-25 seconds; audible click signals completion
Relearning Friction on Vehicle Switch
- Flexible: High: different vehicle anchors, seat geometry, and webbing routing require re-evaluation each time
- Semi-Rigid: Moderate: connectors rotate, so angle changes demand attention
- True Rigid: Minimal: if anchors are reachable, installation is identical
Tactile Feedback (Is It Right?)
- Flexible: Ambiguous: you must press, listen for subtle changes, and accept uncertainty
- Semi-Rigid: Clear: smooth rotation and slight resistance before final seat settlement
- True Rigid: Unambiguous: the click is non-negotiable; there is no partial engagement
Step-by-Step: Comparing Your Convertible Seat's Installation Reality
Before you choose, use this checklist to audit which mechanism suits your life.
Step 1: Map Your Vehicle Fleet and Frequency
List every car the seat will occupy and how often you'll move it: If you frequently swap seats between caregivers, check our best seats for multiple vehicles for transfer-friendly picks.
- Daily use: Primary vehicle only → flexible or semi-rigid is tolerable
- 3+ times weekly moves: Partner's car, rental, grandparent pickup → true rigid LATCH eliminates relearning friction
- Monthly or annual transitions: Multiple children or handing down → true rigid's zero-variability geometry matters most
Step 2: Check Anchor Accessibility in Your Vehicles
Not all seats can accommodate rigid arms. Visit your target vehicle and measure the depth and angle of the lower anchor seats:
- Compact or sedan rear: Anchors often recessed 2-4 inches; true rigid arms may require angled approaches
- SUV or van rear: Anchors typically more forward-facing; rigid arms usually click without contortion
- Minivan center row: Anchors closest to child's body midline; rigid geometry can create tight squeezes
Rigid LATCH seats need a clear, shallow approach path. If your anchor is buried 5+ inches back or at a sharp downward angle, semi-rigid or flexible LATCH may actually be easier[1].
Step 3: Test Installation Under Real Conditions
If possible, visit a retailer that allows floor-model trials or rent the seat for a day: To compare quick-release latches, tension indicators, and other fast-transfer features, see our car seat transfer mechanisms test.
Flexible LATCH trial:
- Install once in your car, tighten fully, then remove and reinstall immediately
- Note your effort (arm strain, hand fatigue, time)
- Reinstall again 24 hours later; did you remember the exact tightness level?
Rigid or Semi-Rigid trial:
- Install in your car, noting how many adjustments you made
- Remove and reinstall twice in one session
- Try installation in a second vehicle if available; log relearning time
Checkpoint: If you can reinstall twice cleanly without second-guessing, that's your candidate[2][4].
Step 4: Quantify Failure Modes You Can't See
Research has shown that rigid LATCH systems have a much lower potential for mistakes in installation compared to flexible systems requiring strap tightening[4]. Compare publicly available crash test reports or CPST (Certified Child Passenger Safety Technician) feedback for your shortlist:
- Did the seat require installation corrections in real-world audits?
- Are there manufacturer notes about common misinstallation patterns?
- Does the manual address left-right symmetry or common tether-routing errors?
Seats with visual indicators (color-coded connectors, indicator windows, or tactile detents) outperform ambiguous designs[4]. We highlight the clearest, most error-proof feedback systems in our foolproof installation comparison.
Step 5: Validate LATCH Weight Limits Against Your Child's Current and Projected Size
LATCH systems have weight restrictions (typically 40-65 lbs depending on the seat), and when weight exceeds the limit, LATCH can no longer be used, you must switch to seat belt[1]. Cross-check:
- Your child's current weight percentile
- Projected weight at age 2, 3, and 4
- The seat's LATCH weight cap and seat-belt-only upper limit
- Whether your vehicle can accommodate seat-belt-only installations if needed
This prevents a mid-use discovery that LATCH is no longer legal for your child.
Comparing Installation Force Across Market Leaders
Clek Foonf (True Rigid LATCH, Forward-Facing Mode)
Installation force: Minimal. Rigid arms lock with audible click; no strap tightening. Typical install time: 18 seconds per side.
Vehicle constraints: Requires accessible anchor approach; not ideal for seats with deeply recessed anchors.
Repeatability: Excellent: identical setup every reinstall; no learning curve transfer between vehicles.
Trade-off: Slightly higher purchase cost; true rigid systems are rarer and command a premium[1][2].
Nuna Pipa Aire RX (Semi-Rigid LATCH)
Installation force: Moderate. Connectors rotate, offering flexibility; installation time: 50-65 seconds per side with hand pressure.
Vehicle constraints: More forgiving than true rigid for awkwardly angled anchors; works in tighter spaces[1].
Repeatability: Good: semi-rigid geometry is predictable, but slight variations in hand pressure affect final tightness.
Trade-off: Faster than flexible but slower than true rigid; a middle-ground option for vehicles with non-standard anchor geometry[1].
BabyArk Convertible (Flexible LATCH Option)
Installation force: Variable. Webbing strap requires operator judgment; installation time: 90-120 seconds per side, including tension verification.
Vehicle constraints: Adaptable to any anchor location; works in recessed, angled, or unconventional placements.
Repeatability: Moderate: operator must remember tightness level and hand pressure; higher risk of under-tightening on re-installs[1].
Trade-off: Lower purchase cost; most versatile across vehicle types; requires higher user attentiveness[1].
The Hidden Installation Friction: Belt Path Routing
LATCH addresses the lower anchor connection, but top-tether routing and seat-belt paths are separate reliability factors. Seats with color-coded or offset webbing routing require fewer re-threading errors[4]. During your test install, note:
- Can you thread the belt path one-handed?
- Does the seat manual use photos or diagrams clear enough to follow in low light?
- Are there keeper loops or guides that prevent tangling?
Building Your Install Repeatability Checklist
Once you've narrowed to one or two seats, create a vehicle-specific installation guide:
For each vehicle where the seat will live:
- Photograph the anchor locations and approach angle
- Measure lower anchor depth and belt-path accessibility (in inches)
- Time your first install; note any surprises
- Reinstall twice in one week; log time and effort
- Create a 3-step photo guide on your phone (anchor attachment → tightening → final check)
- Share the guide with all caregivers who will use the seat
Seats that survive this process without confusion or hesitation are the ones that actually work in your real life.
Final Verdict: Which Installation Mechanism Wins?
True Rigid LATCH (Clek Foonf, Clek Liing) is the gold standard for repeatable, foolproof installs if your vehicle anchors are accessible. The audible click and zero-variability geometry eliminate installation errors and relearning friction across vehicle swaps.
Semi-Rigid LATCH (Nuna Pipa Aire RX, BabyArk) is the practical compromise: faster than flexible, more forgiving than rigid, and suitable for most vehicles. Best for families managing multiple cars or caregivers with varying comfort levels.
Flexible LATCH remains the most adaptable option for non-standard vehicle geometry but demands the highest operator consistency and carries the greatest risk of under-tightening on re-installs.
Your choice depends on three factors:
- Vehicle anchor accessibility: Easily reachable? → True rigid. Recessed or angled? → Semi-rigid.
- Install frequency: Staying in one car? → Any system works. Frequent vehicle switches? → True rigid eliminates relearning.
- Caregiver consistency: Solo user? → Flexible is tolerable. Multiple caregivers? → Rigid's click-lock removes ambiguity.
The bottom line: if it installs easily twice, it fits your real life. Measure your force, time your setup, and choose the mechanism that removes guesswork from the seats where your child spends the most time. That's how fit beats features.
Related Articles